5.1 Stone Texture
It took me a while to create good looking stones. There's nothing much new here but the subtleties of the settings for the layer styles ended up being quite important.
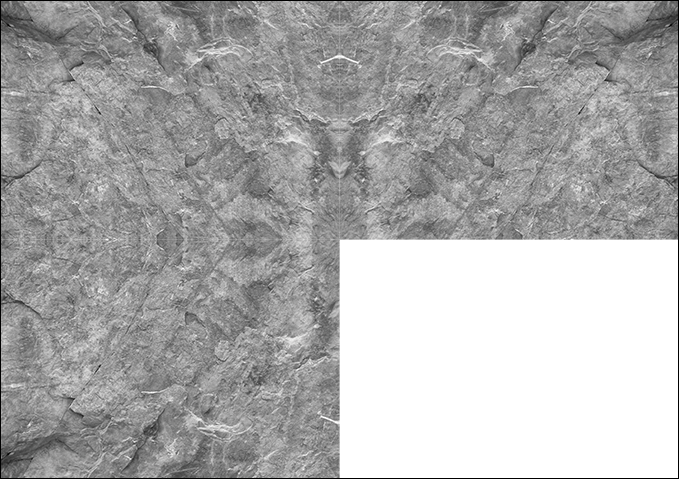
The first steps should be very familiar. Create a layer called "Stones", fill it with a suitable stone-like texture and create a layer mask. In this case, I used a photograph of the surface of a rock at a quarry and desaturated so it was a suitably rocky grey instead of the actual rocky brown of the original.
The benefit to it being my own work is that I can provide the original texture. Click the thumbnail below to download (careful - it's big 'un).
This texture doesn't seamlessly tile - not even close. This is for two reasons.
- Making a texture seamless is fiddly and annoying.
- We can cheat.
The cheat is based on the point that the stones will be small and the texture large. We still don't want seams but we can make seams that look awful but that work perfectly okay once we have a layer mask and layer styles applied.
Basically we flip it. We start with our whopping great big photograph in one corner of our canvass.
Flip it horizontally.
Then vertically.
And then both.
The result is a texture that tiles but not completely seamlessly since it looks like rock kaleidoscope. Again, though, once this is set up for drawing stones, it works just fine. If you are interested in creating a truly seamless texture, there are a vast number of tutorials on the web.
5.2 A Few Quick Stones
Once you have your texture tiles across your canvass and a layer mask applied, we can create a few quick stones so we can see what we're doing. A small hard edged, round brush is best here.
They look truly awful but bear with me.
5.3 Layer Styles
First we need a 3D effect on the stones, which usually means a Bevel and Emboss layer style. Set it up as below.
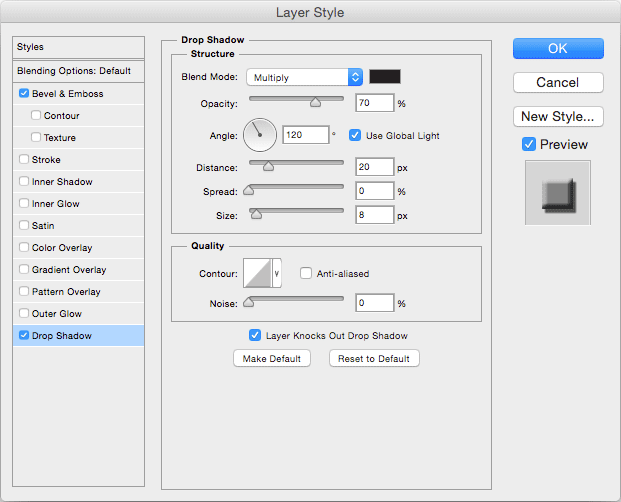
The next thing any 3D object needs is a shadow. Set up a drop shadow for the stones as below.
The result should look like this.
That's not bad at all but the stones look a little out of place. The problem is that these stones are rounded but there is no shadow on the sides. They are shading the ground but the ground isn't shading them.
An inner glow can fix this. However, "glow" is a bit misleading. With these settings, it's more like another shadow effect.
We have some very good stones now but in my endless tweaking and fiddling around, I found one more effect I like to add. If your computer is starting to struggle with the multiple, high resolution, A3 layers with numerous layer styles, perhaps you should leave this one out. Otherwise, we can add a bit of 3D detail to the rocks using a texture bevel, which is a sub-category of bevel and emboss.
Pretty much any texture will work well here. After playing around, I picked the same one I used on the water but I don't think there are many bad options and you can pick your own. Be aware that the scale and depth that looks good will probably be different for each texture, so it's worth mucking around with the sliders.
5.4 Drawing Rocks
Once again, you already have the basics. A smallish, hard edges brush is the way to go and you should always make the rock more than just a circle, since that looks unnatural. Variations on a slightly lumpy oval work well.
Stones work well to add a bit of interest to otherwise boring grassy plains but I also use rings of them for campfires and, as you've seen, stepping stones across creeks.
With the stepping stones, however, there is one more thing to do. Here's a close up of what we have now.
The stones are kind of sitting on top of the water and not affecting the flow at all. We can fix this with these steps.
- Select the contents of the stone layer by holding down Control (on the PC) or Command (on the Mac) and clicking on the Stone layer mask thumbnail.
- Select the water layer's mask.
- Press backspace.
This will delete the water where the stones are placed, giving them the shallow water effect around them.


